Selecting a Shipping Address
Over the coming months, a new interface will be rolled out to uSOURCE users. The sections below provide instructions for both the Classic User Experience and the New User Experience.
Classic User Experience
The shipping address identifies where the Supplier will ship your order.
To select or edit the shipping address of a Requisition:
-
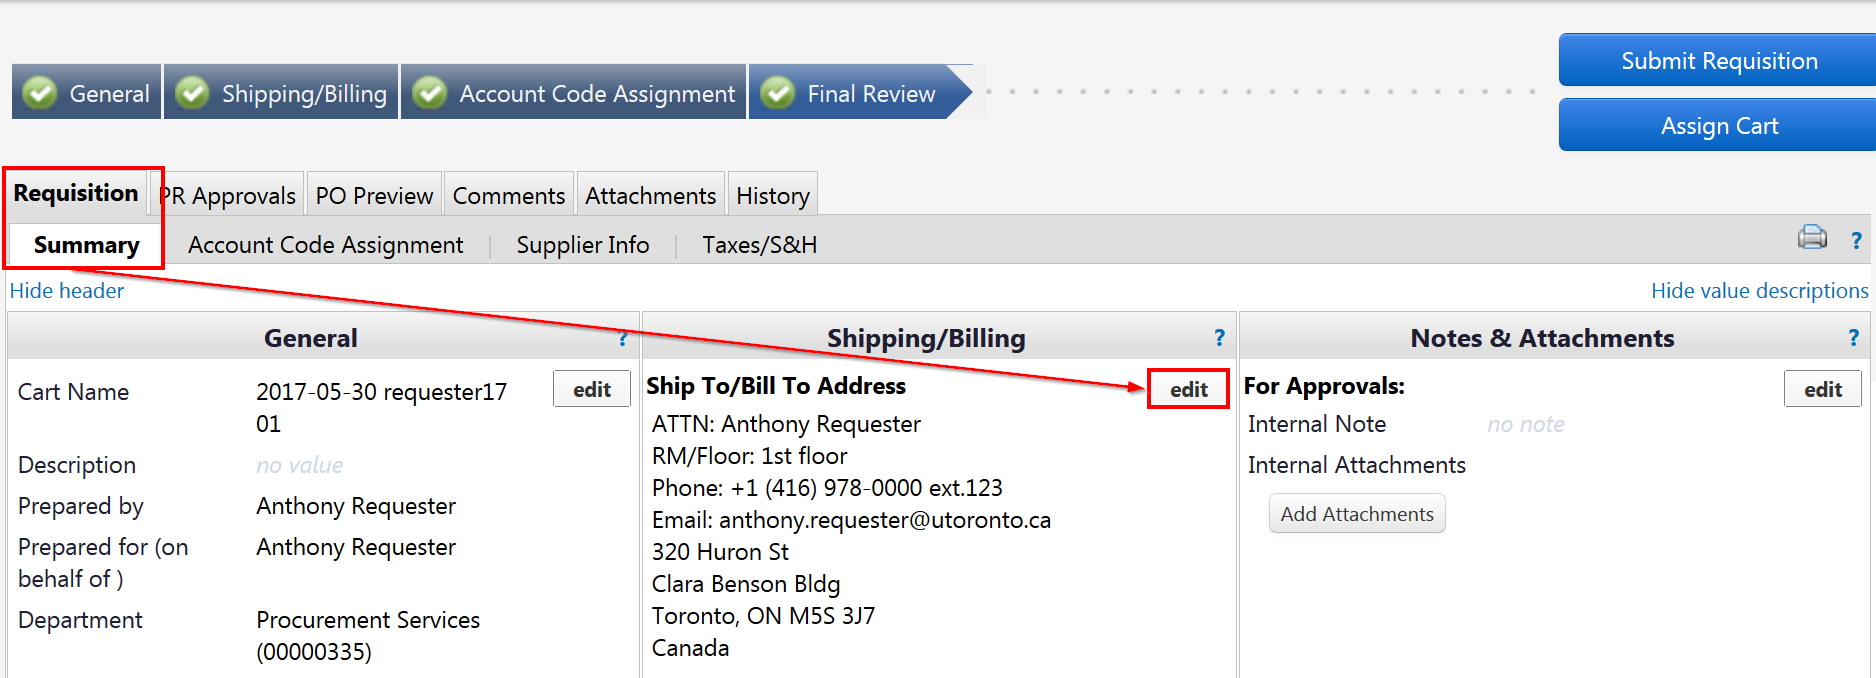
- From the Requisition > Summary tab, under Shipping/Billing, click the Edit button.
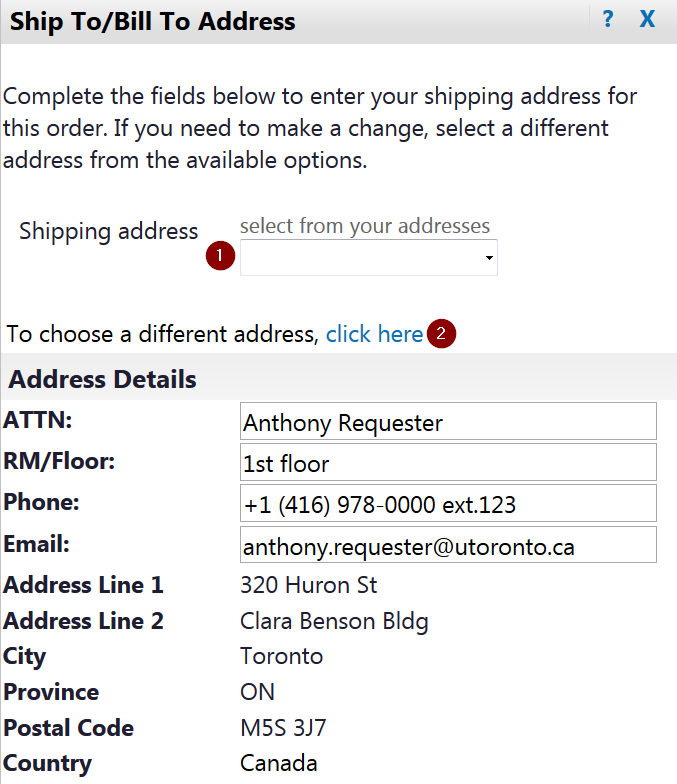
- To select a default shipping address from your user profile, click the drop down menu under select from your addresses (1) and press the Save button to proceed to the next step in the check-out process. To search for another U of T shipping address, click the click here link (2).
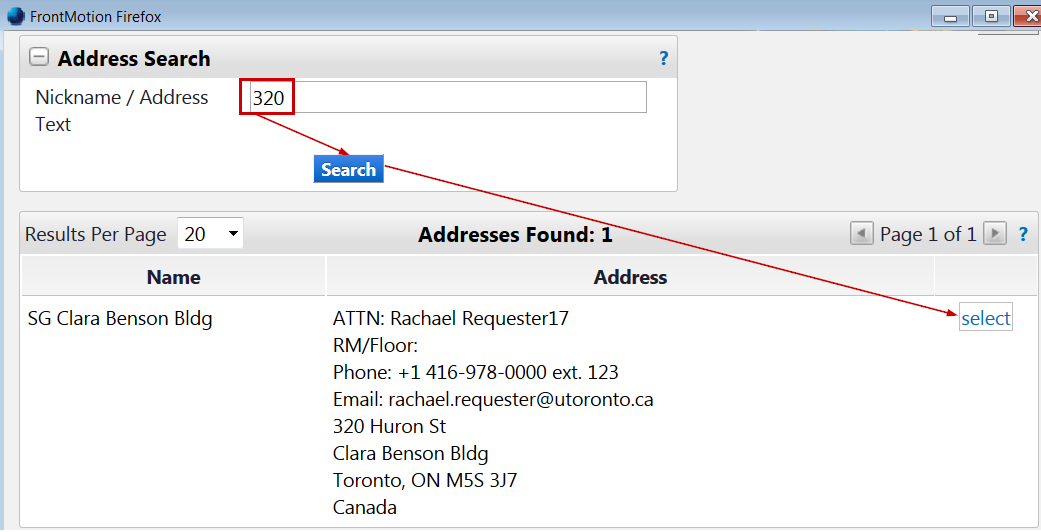
- Click select from org addresses. Enter a search term, then click Search. Try to keep the search term as simple as possible (e.g. enter street number only, otherwise you may exclude the address you want). Click select next to the address you want to use.
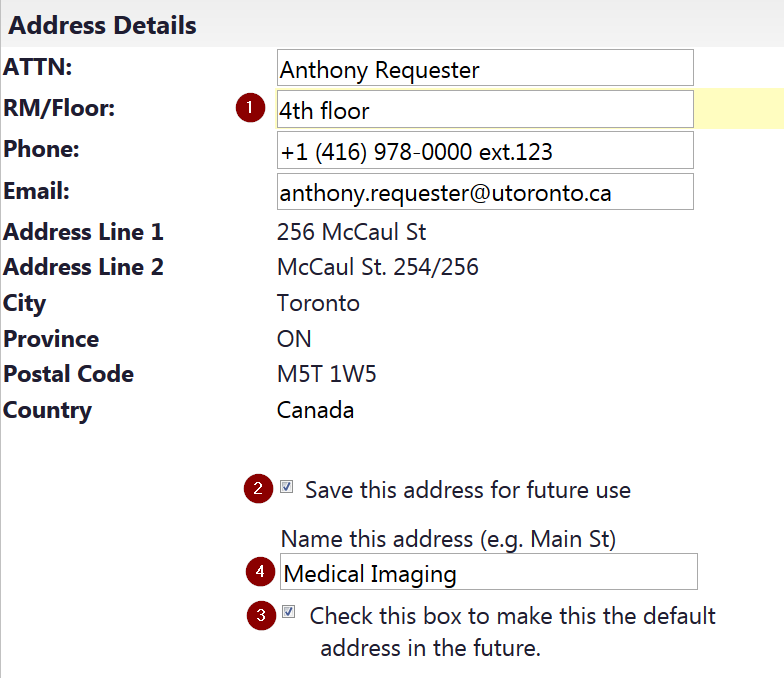
- Enter the room or floor number (1), and if necessary edit the contact information. To add this address to your user profile, select the checkbox next to Save this address for future use (2). You can also make it the default address for all orders (3), and change the nickname if necessary (4).
- From the Requisition > Summary tab, under Shipping/Billing, click the Edit button.
- When all changes have been made, click the Save button.
New User Experience
The shipping address identifies where the Supplier will ship your order.
To select or edit the shipping address of a Requisition:
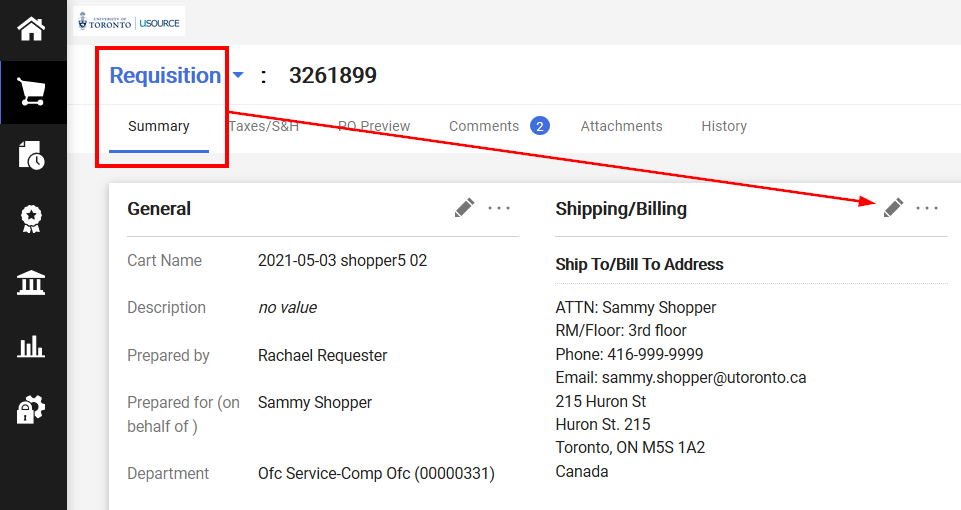
- From the Requisition > Summary tab, under Shipping/Billing, click edit (pencil) icon.
- If you have already setup a default shipping address in your profile, it will be pre-populated in the CURRENT ADDRESS section (1). You can also select other shipping addresses from your user profile (2). To search through all U of T shipping addresses, click the search (magnify) icon in the Search additional field (3). To add this address to your profile for future use, check Add to my addresses (4).
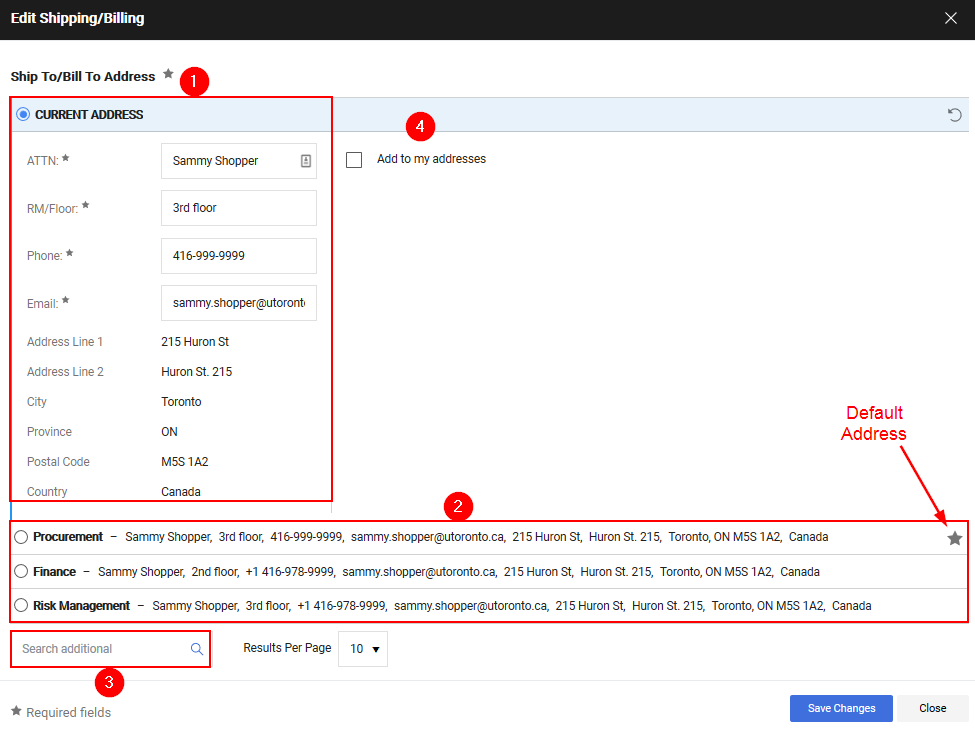
- When all address information has been entered, click the Save Changes button.
Last Updated: May 31, 2021
Ordering